Indoor Air Quality Testing
Indoor air quality testing involves collecting and containing samples of ambient air from inside a building and analyzing them to determine what chemicals may be affecting human health and safety. Sources of pollution may exist on- or off-site and can accumulate above- or below-ground. Indoor air quality testing is necessary at any site where potential subsurface chemical contamination exists. In general, it can be a recommendation of a Phase 1 Environmental Site Assessment and is usually part of a Phase 2 Environmental Site Assessment. Moreover, sites without subsurface pollution can still have a lower quality of air due to naturally occurring gasses such as radon and methane. An indoor air quality test is the only way to be certain that the air is safe for breathing by employees, residents, and visitors. Updated April 18, 2024.
Pollution and Human Health
Petroleum products, solvents, and other chemicals in the subsurface can drastically compromise the quality of air at a site. This can put a property owner at risk of severe health impacts and environmental compliance violations. After initial air quality testing analysis, scientists determine the chemicals of concern at a property. Additionally, a subsurface investigation may ensue to determine the source and extent of the chemical contamination underground. Conversely, an existing Phase 2 ESA may already confirm the presence of subsurface contaminants above Phase 2 screening level numbers. In such a case, an indoor air quality test supplementally determines whether the chemicals below ground are affecting air quality above the surface. A long-term remediation plan may be necessary. Although it is possible to take more immediate action in the form of mitigation. For example, increasing indoor ventilation is one way to mitigate indoor air quality hazards.
Vapor Intrusion Investigation
When Volatile Organic Chemicals (VOCs) are subject to subsurface pollution (as a liquid), they volatilize, meaning they become vapor and return to the surface as a gas. These chemical vapors can penetrate the foundation of a building through small cracks and enter the indoor air through a process called “vapor intrusion.” In fact, sites with no subsurface contamination can also be at risk for vapor intrusion. For instance, off-site chemical contamination plumes can volatility, and migrate horizontally into adjacent lots. Similarly, off-site contamination sources can also migrate through the outdoor air, and enter a building through gaps, cracks, and open windows.
Indoor Air Quality Testing Procedure:
A site that may be at risk for vapor intrusion will require indoor air quality testing to first determine what pollutants are present in the air. Then, the threat to human health due to whatever chemicals are present in the air can undergo toxicological evaluation by what is known as a Human Health Risk Assessment (or HHRA). For instance, in California, the primary standard to compare vapor intrusion against is the Department of Toxic Substances Control’s (DTSC) Human and Ecological Risk Office (HERO) Note 3. This guidance provides appropriate screening levels for a variety of known toxins.
Step 1 – Indoor Air Quality Test Pre-Sampling Survey
The first step in a proper air quality assessment is to conduct a pre-sampling building survey, chemical inventory, and basic air quality screening of the site. Thus, the completion of a Building Survey Form is a prerequisite to an actual sampling event. By taking inventory of any on-site chemicals, and noting outdoor air quality and weather conditions, scientists can produce background information. This helps to further interpret the sampling results and any possible influencers of detections that are not associated with vapor intrusion. For instance, a photoionization detector (PID) can be used to preliminarily screen the sampling locations for the presence of VOCs on a qualitative basis. The pre-sampling survey will also note air circulation conditions at the site, and ensure that windows are closed and that heating, ventilation, and air conditioning (HVAC) systems are off.
Step 2 – Indoor Air Quality Assessment Sampling Methodology
“Whole Air Sampling” is the process by which the air in a room is drawn directly into a container. There are two main ways to collect samples this way for indoor air quality testing purposes.
Tedlar Bags
The first is to use a motor-aid pump to draw the air in through a tube. The final step in this process results in containment via a specialized bag such as the Tedlar® brand polyvinyl fluoride (PVF) bag. This special film will not react with any chemicals in the air sample. It comprises a one-way valve that allows the air sample to enter the bag without containment, and without leaking. The air can be put on hold for up to three days before analysis. Thereafter, a chemist will draw the air out of the bag using a syringe for analysis. Tedlar bags are economical, convenient, and easy to use.
Summa Canisters
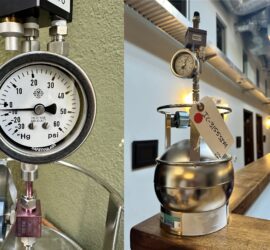
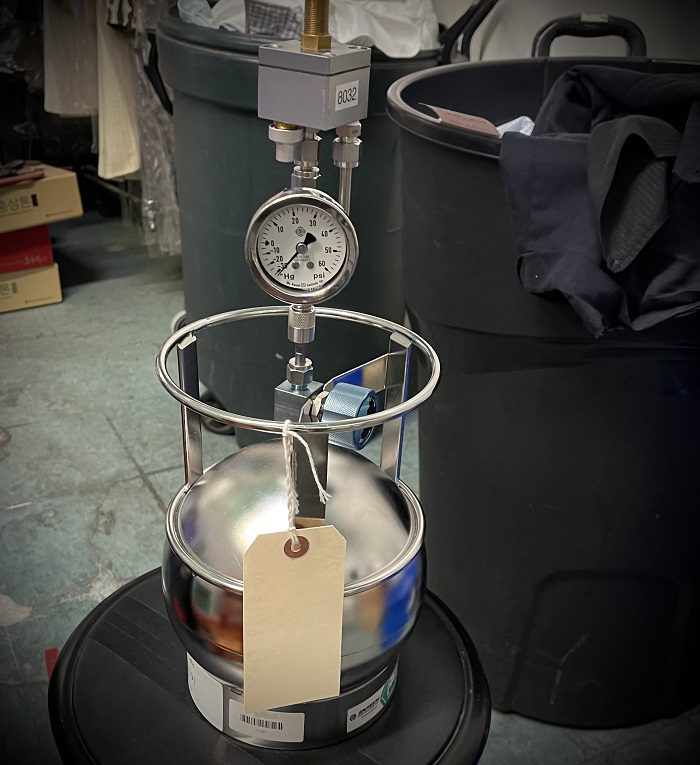
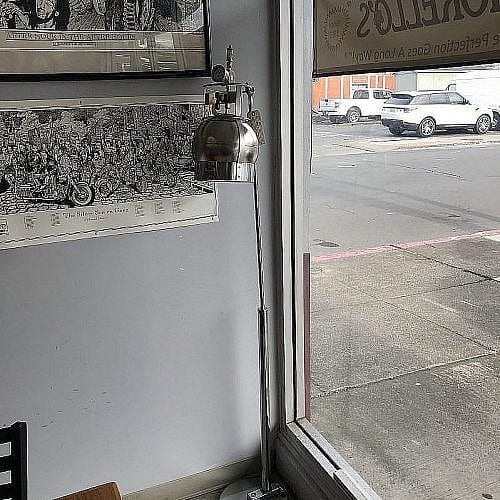
Alternatively, 6-liter Summa canisters can be applied for the use of indoor air quality sampling. In fact, this is the most accurate and preferable way to conduct indoor air quality testing. This method utilizes a metal container that has a special stainless steel surface that has undergone what is known as the “Summa” process. This creates a collection canister that is chemically inert, even more so than the PVF bags.
The Summa canister, while reusable, can be 100% certifiably clean by laboratories. This certification comes before the canister arrives at the sampling site under negative air pressure. Laboratory certification and a proper vacuum are important to document for projects with agency oversight. When the valve opens, the vacuum pressure allows the canister to draw in the surrounding air without any mechanical pumps. Airflow regulation is necessary such that a representative sample of the air quality can be slowly taken over 8 hours or 24 hours. Whether the sample is contained in a bag or a canister, the chemical analysis process will be essentially the same once the sample arrives at the lab.
Step 3 – Indoor Air Quality Sample Laboratory Analysis
After sample collection, a laboratory with state certification transports each air canister, under the proper chain-of-custody protocol, to their testing facility for analysis. There, the samples undergo analysis in accordance with the appropriate EPA laboratory analysis methods. For example, the EPA TO-15 SIM method is a common form of VOC analysis. This method, which tests for toxic organics (TO), uses a selective ionization method (SIM) for higher accuracy and precision.
The TO-15 method allows for very accurate identification of a wide range of target chemicals that may be selected for analysis. During analysis by this method, chemists extract, concentrate, and dry a specific volume. Drying aims to remove any excess liquid within the sample. Afterward, the chemists use a mass spectrometer to identify the compounds present within the sample. In order to achieve ultra-low detection limits, selective ionization applies, whereby the sensitivity of the analysis increases. After a deliverable report is in hand, geologists, toxicologists, and other environmental professionals interpret the results. Final evaluations aim to understand what chemicals are in the air and make inferences about where they come from.
Step 4 – Interpreting Indoor Air Quality Investigation Data
It is important to view the lab results through the lens of whichever standards are most applicable. Different regulatory agencies apply different screening levels on the basis of land use and other circumstances. For example, the EPA has set forth regional screening levels (RSLs) which may differ from the Occupational Safety and Health Administration (OSHA) Permissible Exposure Limits (PELs) screening levels. When conducting an HHRA, it is important to understand what the land use is, in order to apply scenarios that account for the correct level of exposure. To illustrate, a property used for residential purposes will usually require more stringent air quality standards compared to industrial or commercial use. Per the assessment of current air quality conditions, geologists and engineers can establish the goals for a property by the use of a mitigation plan or a remedial action plan.
Mitigation and Remediation After an Indoor Air Quality Test
Sometimes, an indoor air quality investigation will end after the first phase of testing, with a recommendation for no further action. Alternatively, if the air quality is poor, corrective action will be the next course of action. The EPA recommends three general ways to improve air quality. Any combination of these interim measures can improve air quality temporarily (mitigation). Nonetheless, the most important action is to eliminate the source of pollution (remediation).
The first is to control the source of pollution. For instance, removing a leaking underground storage tank (UST) comprising fuel and other contaminants, or soil contamination excavation. In the case of subsurface contamination stemming from a chemical release, there will be specific steps to work toward environmental remediation. While each site is unique, there are many different techniques, and the most appropriate clean-up method must apply. And although this can be a lengthy process (sometimes lasting many years), there are interim steps.
The second EPA recommendation to improve air quality is to increase ventilation. For instance, the methane mitigation process aims to remove hydrocarbon and volatile soil gas from the subsurface of a structure and prevent migration. Furthermore, opening windows and utilizing fans and HVAC systems can advance interior air circulation and bring fresh air into the building.
Lastly, the EPA recommends the use of air cleaners and filters that draw air in and clean it with mechanical filtration. For instance, a soil vapor extraction system that treats gas through carbon canisters. Scientists understand that carbon filters can strip hydrocarbon and volatile components from the air.
Authors:
Written By: Michael J. Sabo (Project Geo-Scientist)
Co-Written By: Adam A. Kaligi, PG (Professional Geologist)

